Author: Easy Eats Hub

Dutch Oven Sourdough Bread with Starter Recipe

Dutch Oven Sourdough Bread With Starter Recipe

When you decide to tackle Dutch oven sourdough bread with a starter, you’re not just baking; you’re embracing a time-honored tradition. You’ll find that the combination of a robust starter and the Dutch oven creates a crust that’s both crispy and chewy, while the interior remains delightfully airy. You may already have a few questions about the process or ingredients, and that’s completely normal. The journey to perfecting this bread might reveal some surprising techniques and tips, inviting you to investigate further. What could possibly improve your experience?

Key Takeaways

  • Begin with an active sourdough starter, fed 12-24 hours prior, to ensure proper fermentation and rise during baking.
  • Combine ¼ cup starter, 1½ cups warm water, 4¼ cups flour, and 1½ tsp salt to form your dough.
  • Allow the dough to rise for at least 6 hours until it doubles in size, using stretch and fold techniques for gluten development.
  • Preheat your Dutch oven to 450°F for 30-45 minutes before baking to achieve the best crust and steam retention.
  • Score the dough before baking for proper expansion, and cool on a wire rack for 1 hour before slicing.

History

Sourdough bread boasts a fascinating history that traces back to Ancient Egypt, where it emerged as one of the oldest forms of leavened bread.

  • Ancient Revelation: Egyptians inadvertently stumbled upon sourdough by leaving out bread dough, attracting wild yeast from the environment.
  • Cultural Spread: This method was quickly adopted by the Ancient Greeks and later spread throughout the Roman Empire, signifying the bread’s value.
  • Accidental Invention: The creation of sourdough is often seen as a happy accident from early bakers’ trials. Sourdough is popular for its health benefits, offering a unique taste that has captivated many throughout history.

In the United States, sourdough gained prominence during the California Gold Rush. Miners relied on sourdough starters because commercial yeast was scarce.

San Francisco became a hub for sourdough, largely due to French immigrants like Isidore Boudin, whose bakery helped popularize the bread. Miners with sourdough starters earned the nickname “sourdoughs.”

Later, the revelation of commercial yeast in the mid-19th century diminished the reliance on sourdough starters.

However, sourdough experienced a resurgence during the COVID-19 pandemic, reaffirming its cultural significance and deep-rooted American heritage, especially in places like San Francisco.

Recipe

Making sourdough bread in a Dutch oven is a rewarding culinary adventure that yields a crusty exterior and a soft, chewy interior. The process utilizes a natural leavening agent—the sourdough starter—to achieve a delightful flavor and texture. Patience and technique are key in this method, especially during the stretching and folding stages, which help develop gluten and create an airy loaf. Additionally, using a Dutch oven for baking helps create a beginner-friendly environment as it retains moisture, resulting in a better crust.

To start, verify your sourdough starter is active and bubbly, having been fed within 12-24 hours before you begin. This recipe calls for an initial mixing of the starter with warm filtered water, followed by the incorporation of flour and salt to form a shaggy dough. After a resting period, the dough undergoes a series of stretch and fold motions to improve its structure, followed by an ample rise to allow the yeast to work its magic.

Ingredients:
– ¼ cup (60 grams) active sourdough starter
– 1 ½ cups (350 grams) warm filtered water (about 100°F)
– 4 ¼ cups (500 grams) all-purpose flour
– 1 ½ teaspoons (9 grams) fine sea salt
– Optional: herbs, nuts, seeds, cheese, dried fruits

In a large mixing bowl, combine the active sourdough starter and warm water, then add the flour and sea salt, mixing until a shaggy dough forms. Allow the dough to rest for 30 minutes before performing the stretch and fold technique by stretching the dough in a clockwise motion.

Let the dough rise for at least 6 hours until it has doubled in size. After the first rise, shape the dough into a round or oblong form, place it on parchment paper, and score the top with a lame or sharp knife. Preheat your oven to 450°F, place the dough in a preheated Dutch oven, and cover with the lid.

Bake for 30 minutes covered, then remove the lid and bake for an additional 20-30 minutes until golden brown. Ultimately, bake directly on the oven rack for another 10 minutes for a crisp crust. Allow the bread to cool for at least 1 hour before slicing.

Extra Tips: For the best results, verify your kitchen is warm and draft-free during the rising periods, as this aids yeast activity and dough fermentation. Feel free to experiment with additional flavors by folding in herbs, nuts, or cheese during the mixing phase.

Finally, always use a sharp knife or lame for scoring to verify clean cuts, which allows for better expansion during baking. Enjoy the process, and don’t hesitate to adjust the baking times based on your oven’s characteristics!

Final Thoughts

Have you ever experienced the satisfaction of pulling a freshly baked loaf from the oven? If you haven’t, making Dutch oven sourdough bread is an excellent way to start. The Dutch oven is your secret weapon, trapping steam and creating an ideal environment for a perfect rise.

Here are some key takeaways for successful baking:

Benefits of Using a Dutch Oven:

Essential Tips:

  • Preheat: Let the Dutch oven reach 450°F for at least 30 minutes.
  • Score the Dough: Allows for proper expansion, enhancing aesthetics.
  • Handling: Use parchment paper to avoid burns while lowering the dough inside.

Final Steps:

  • Baking: Cover for 20 minutes, then uncover for 25 minutes.
  • Cooling: Rest the loaf on a wire rack for at least an hour before slicing.

Following these guidelines will help you create stunning sourdough bread, making each loaf a reflection of your baking skills.

Enjoy your baking journey!

FAQ

As you adopt the art of baking Dutch oven sourdough bread, questions are bound to arise along the way. Here are some FAQs to guide you through the process:

General Tips:

  • Use an active sourdough starter that has doubled in size with visible bubbles.
  • Transfer dough using parchment paper to prevent sticking.
  • Preheat the Dutch oven at 450°F for at least 45 minutes.

Common Issues:

  • If your loaf’s bottom burns, using parchment paper can help. Using a baking tray under the Dutch Oven will provide additional insulation to further reduce the risk of burning.
  • A chewy bottom may indicate underbaking; check for an internal temperature of at least 205°F.
  • Place the Dutch oven higher in the oven for better heat distribution.

Equipment Essentials:

  • A cast iron Dutch oven is recommended for even heat.
  • Use a lame or razor blade for scoring.
  • Digital scales guarantee accurate measurements.

Baking Process:

  • Let the dough autolyse for 30 minutes for hydration.
  • Bulk ferment overnight or for several hours to develop flavor.
  • Score the bread just before baking for better shape control.
  • Cool the loaf before slicing to set the crumb structure.

With these tips, you’ll master Dutch oven sourdough bread baking.

Almond Milk Hot Cocoa Recipe – Dairy-Free Indulgence

Almond Milk Hot Cocoa Recipe – Dairy-Free Indulgence

Imagine hosting a cozy gathering where you surprise your guests with a rich almond milk hot cocoa that caters to both dairy-free diets and indulgent cravings. This easy-to-make beverage not only satisfies chocolate lovers but also encourages you to experiment with flavors and toppings. As you prepare to craft this delightful drink, you might wonder about the origins of this popular choice and what adjustments can enhance its taste even further.

Key Takeaways

  • Combine almond milk, cocoa powder, sugar, salt, and vanilla extract in a saucepan and heat until simmering for a rich hot cocoa.
  • Customize your beverage with toppings like dairy-free whipped cream, marshmallows, or spices to enhance flavor.
  • Enjoy a healthy option with only 120 calories per 8 fl. oz and high calcium content suitable for dairy intolerances.
  • Stir continuously while heating to achieve a smooth texture, avoiding boiling to prevent curdling.
  • Feel free to experiment with other plant-based milks for diverse flavors in your hot cocoa.

History

The history of hot chocolate dates back over 3,500 years, showcasing its rich evolution from ancient rituals to modern comforts.

Originating with the Mayans around 1500 BC, hot chocolate was initially crafted from crushed cocoa, cornmeal, and chili pepper. The drink held significant value, often used in rituals and regarded for its health benefits. It was even believed that cocoa had medicinal properties that contributed to improved mood, making it a cherished beverage in various ancient cultures.

Later, the Aztecs adapted this beverage, with Emperor Montezuma II even stockpiling cacao due to its desirability. They incorporated cocoa into military rations, fueling soldiers during their campaigns.

When Hernando Cortés conquered the Aztecs, he introduced cocoa to Spain, where it underwent transformation. Sugar was added to counter its bitterness, creating the sweeter Spanish hot chocolate.

Recipe

Indulging in a warm cup of almond milk hot cocoa can be a delightful experience, especially on chilly evenings. This creamy, delicious beverage isn’t only vegan and dairy-free, but it’s also a perfect way to satisfy your chocolate cravings while enjoying the benefits of almond milk. The combination of coconut sugar with almond milk creates a natural sweetness that enhances the cocoa experience.

Whether you prefer using the stovetop or microwave method, this recipe is simple and quick to whip up, making it a favorite for cozy nights in or a special treat for guests.

The beauty of this hot cocoa recipe lies in its versatility. You can customize it to suit your taste preferences by adjusting the sweetness or adding various flavorings. It’s a great opportunity to experiment with different toppings and mix-ins, guaranteeing that your hot cocoa isn’t just a drink, but an experience.

So gather your ingredients and let’s get started on this delectable hot chocolate treat!

Ingredients:
– 1-2 cups unsweetened almond milk
– 1/4 cup cocoa powder
– 1/4 cup sugar (or sweetener of choice)
– Pinch of salt
– 1 teaspoon vanilla extract
– Chopped chocolate or dairy-free chocolate chips (to taste)

In a medium saucepan, combine the almond milk, cocoa powder, sugar, salt, and vanilla extract. Heat the mixture over medium heat, stirring occasionally until it simmers—be careful not to let it boil.

Once simmering, allow it to cook for 1-2 minutes to meld the flavors, then remove it from heat and stir in the chopped chocolate or dairy-free chocolate chips until melted. Pour the hot cocoa into mugs and serve immediately for a comforting treat.

Extra Tips: To guarantee a smooth and creamy texture, stir the mixture constantly while heating. Avoid boiling the hot chocolate as it may lead to curdling or scorching.

Feel free to store any leftovers in an airtight container in the fridge; simply reheat before serving. Experiment with different spices, such as cinnamon or peppermint, and try topping your hot cocoa with dairy-free whipped cream, marshmallows, or crushed graham crackers for an added delight!

Final Thoughts

Enjoying a cozy cup of almond milk hot cocoa is more than just a simple treat; it’s a delightful experience that warms both the body and soul. This dairy-free beverage offers a low-calorie alternative to traditional hot chocolate, with just 120 calories in an 8 fl. oz serving. Each serving provides:

  • Carbohydrates: 19g total carbs, including 14.5g sugars.
  • Fat: 4g total fat with 1g saturated fat.
  • Protein: 2.5g protein.

Additionally, almond milk hot cocoa boasts valuable health benefits. It’s suitable for those who are dairy intolerant and serves as a good source of:

  • Fiber: 10% of Daily Value in 8 fl. oz.
  • Iron: 45% of Daily Value in 12 fl. oz.
  • Calcium: 35% of Daily Value in 12 fl. oz. [Understanding the nutritional breakdown of your favorite drinks can help you make healthier choices.] To improve your experience, consider various preparation tips, like heating almond milk on low and using high-quality cocoa powder.

You can investigate customizations such as adding spices, sweeteners, or alternative milks, making your hot cocoa distinctively yours. Ultimately, savoring this wholesome drink can transform a chilly day into a comforting moment of indulgence.

FAQ

For those curious about almond milk hot cocoa, a few common questions often arise.

1. Is almond milk hot chocolate vegan?
Yes, it’s vegan since it uses almond milk, making it suitable for plant-based diets.

2. Is it gluten-free?
Absolutely. All ingredients are generally gluten-free, making it safe for gluten intolerance.

3. Can you use other plant-based milks?
Yes, you can substitute coconut, soy, oat, or cashew milk for different flavors.

4. How does it compare to traditional hot chocolate?
It can be just as rich and creamy while being completely dairy-free.

5. Can you customize it?
Yes, you can easily add sweeteners and spices like cinnamon or peppermint to suit your taste. Additionally, many users express gratitude for the recipe’s easy-to-follow instructions, which enhances the overall cooking experience.

Preparation:
To make it, simply heat almond milk with cocoa powder, sugar, and vanilla extract. You can even use the microwave in 30-second bursts.

Storage:
You can store leftovers in the fridge and reheat them.

Nutritional Information:
It’s a health-conscious choice, lower in calories and fat than traditional hot chocolate, making it suitable for a balanced diet.

Easy Pizza Bites Recipe for Parties and Snacks

Easy Pizza Bites Recipe for Parties and Snacks

If you’ve ever dreamed of producing the ultimate snack that can single-handedly enhance your party from mundane to magnificent, you’re in for a treat. Easy pizza bites are not only simple to whip up, but they’re also a crowd-pleaser that fits perfectly into any gathering. You might be wondering how these little wonders can be customized to satisfy any palate. With just a few core ingredients and endless topping options, you’ll soon find yourself crafting a delicious array that keeps guests coming back for more. Ready to uncover the secrets behind these irresistible bites?

Key Takeaways

  • Preheat your oven to 375°F for optimal baking results to achieve crispy pizza bites.
  • Combine all-purpose flour, baking powder, and Greek yogurt to create a simple dough.
  • Fill muffin tins with the dough and a mix of mozzarella, pepperoni, or any preferred toppings.
  • Bake for 15-25 minutes until golden and serve with marinara sauce or ranch dressing for dipping.
  • Customize your pizza bites with healthier ingredients or various fillings to suit dietary preferences.

History

When you bite into a pizza roll, you’re tasting a piece of culinary history that dates back to the mid-1960s in Duluth, Minnesota. The invention of pizza rolls can be credited to Beatrice Ojakangas, who was aided by entrepreneur Jeno Paulucci. He sought innovative uses for his egg roll wrapping machine, prompting a bold idea: to fill these wrappers with pizza toppings rather than traditional fillings.

Key developments include:

  • Testing over 50 filling ideas, such as classic pizza flavors alongside unique choices like peanut butter and jelly.

  • Utilizing a co-extrusion process, developed by Demaco, which efficiently produces these delicious snacks.

In 1968, Jeno’s Pizza Rolls made their debut, featuring flavors like sausage and pepperoni. This product gained immense popularity, leading to more brands offering similar items. Pioneered the frozen snack industry, Jeno’s Pizza Rolls set the stage for future innovations and market expansions.

The rise of frozen pizza coincided with the growing interest in pizza rolls, reflecting mid-century food innovation. Eventually, brands like Totino’s, originally a small-town pizzeria started in 1951, became trademark names within the industry.

Understanding this history enriches your appreciation for every bite of a pizza roll, connecting you to a broader food culture evolution.

Recipe

Pizza bites are a delightful and versatile snack that can easily be made at home. This recipe combines a tender, flavorful dough with your favorite pizza toppings, making them perfect for parties, game days, or a quick weekday meal. Crafted using simple ingredients, these bites are certain to be a hit with both kids and adults alike. Enjoy the process of assembling these little treats, and don’t hesitate to get creative with toppings to suit your taste!

Begin your cooking adventure by gathering your ingredients and preparing your workspace. With just a few essential steps, you’ll have bite-sized pizzas ready for baking in no time. The combination of the gooey mozzarella and savory pepperoni, complemented by the homemade dough, creates an irresistible flavor that’s perfect for dipping in marinara sauce or ranch dressing.

Ingredients:
– All-purpose flour
– Baking powder
– Kosher salt
– Italian seasoning
– Greek yogurt
– Milk
– Egg
– Mozzarella cheese
– Parmesan cheese
– Pepperoni
– Marinara sauce
– Fresh basil

To prepare the pizza bites, first, preheat your oven to 375 degrees F. In a mixing bowl, combine the dry ingredients: flour, baking powder, salt, and Italian seasoning. Next, add the wet ingredients: Greek yogurt, milk, and egg, and mix until a dough forms. Knead the dough until it feels tacky but not sticky, then divide it into small pieces.

Press each piece into a greased muffin tin, creating a well in the center for the toppings. Fill each cup with a spoonful of marinara sauce, a generous amount of mozzarella and Parmesan cheese, and a couple of slices of pepperoni. Bake in the preheated oven for 15 minutes, then for 3 minutes more to guarantee the cheese melts, and finally, bake for an additional 20-25 minutes until golden and puffed. Allow the pizza bites to cool before serving with warmed marinara sauce.

When making these pizza bites, feel free to get creative with the toppings to make them your own. You can incorporate different cheeses like cheddar or Monterey Jack for a unique twist. If you’re short on time, consider using premade pizza dough to expedite the process. The pizza bites can also be enjoyed with inspired recipes like Pizza Sausage Rolls for a fun mix.

For healthier options, swap regular pepperoni for turkey pepperoni, or use whole wheat or gluten-free flour. If you want to enjoy these later, they freeze well, making them a convenient snack for busy days. Remember to handle the dough gently to avoid overworking it for the best texture. Enjoy your cooking!

Final Thoughts

After enjoying the delicious process of making your pizza bites, it’s time to reflect on their versatility and appeal. These snacks stand out for several reasons:

  • Customization: You can easily adapt the recipe to fit dietary preferences by using different meats, cheeses, or vegetables. For a healthier twist, consider turkey pepperoni or additional veggies.

  • Preparation: With various methods available, you can choose between using biscuit mix or store-bought pizza dough, making them accessible for all skill levels. Additionally, you can freeze baked bites for up to 2 months, which allows for easy storage and quick reheating.

  • Cooking Techniques: Whether you bake them or cook them in a skillet, you’ll want to focus on achieving that perfect crispy exterior and a soft, chewy interior.

  • Serving Options: Pizza bites serve well at parties or as part of a larger meal, particularly when paired with marinara sauce or alongside salads and soups.

  • Advance Preparation****: You can make these bites ahead of time and store them for later, making them practical for spontaneous gatherings.

FAQ

Got questions about making pizza bites? You’re not alone! Here are some common inquiries to help you out.

1. What ingredients do I need?
Most recipes call for a simple mix of biscuits, pepperoni, cheese, and your choice of toppings. You can use premade dough or make your own for convenience. Homemade pizza dough or store-bought can be used for added flexibility.

2. How long does it take to prepare?
You can get started in as little as 10 minutes, with baking time between 15 to 25 minutes, depending on the temperature (usually between 375°F and 425°F).

3. Can I customize the toppings?
Absolutely! You can choose from various meats, vegetables, and cheeses. Vegetarian options with ingredients like zucchini and mushrooms are also delicious.

4. How do I store leftovers?
Freeze any leftover pizza bites for quick snacks later. Simply reheat them when you’re ready to enjoy.

5. What dipping sauces pair well?
Consider homemade ranch dressing or spaghetti sauce for dipping. These add flavor and improve the overall snack experience.

With these answers, you should feel more confident in creating your pizza bites! Enjoy your cooking!

Easy S’mores Trail Mix Recipe – Sweet & Crunchy

Easy S’mores Trail Mix Recipe – Sweet & Crunchy

Picture a cozy campfire evening, where the aroma of toasted marshmallows mingles with sweet chocolate and crunchy graham crackers. You can recreate that comforting feeling in just minutes with the Easy S’mores Trail Mix recipe. This delightful combination of textures and flavors is perfect for on-the-go snacking or satisfying a sudden craving. By customizing the ingredients, you can make this mix distinctively yours. Curious about how to bring this treat together so effortlessly?

Key Takeaways

  • Combine Golden Grahams and Teddy Grahams in equal parts as a crunchy base for your trail mix.
  • Add mini marshmallows and chocolate chips for sweetness and indulgent flavor.
  • Include pretzels for an extra layer of crunchy texture, if desired.
  • Mix all ingredients gently in a bowl for even distribution.
  • Optionally, drizzle melted chocolate on top before serving for enhanced taste.

History

Trail mix has a fascinating history that dates back to ancient civilizations, where people combined nuts, seeds, and dried fruits for sustenance during long journeys. This practice began with nomadic tribes and adventurers who needed portable snacks that could endure harsh conditions.

Early trail mixes often included basic ingredients like:

  • Nuts
  • Seeds
  • Dried berries

As trade routes expanded, civilizations diversified their mixtures. Different cultures incorporated regional ingredients, such as dates in the Middle East and sesame seeds in Asia.

The first written mention of trail mix appeared in Horace Kephart’s book “The Book of Camping and Woodcraft” in 1906. Before this time, travelers consumed similar mixtures without a specific name. Interestingly, the origin of modern trail mix can be traced back to two surfers in California who created a simple energy snack in 1968.

References continued into the 19th century, with mention of “studenterhavre” in Denmark in 1833.

Trail mix gained traction in the late 1960s, thanks to Harmony Foods, which successfully marketed the snack to hikers and campers.

The modern version evolved when two California surfers combined peanuts and raisins for an energy-boosting treat in 1968. Its popularity has grown, becoming a versatile snack catering to various dietary needs today.

Recipe

S’mores Trail Mix is the perfect snack for those who crave the classic flavors of s’mores but want the convenience of a mix that can be enjoyed anytime, anywhere. Combining the crunchy, sweet elements of Golden Grahams and Teddy Grahams with the soft chewiness of mini marshmallows and rich chocolate, this trail mix captures the essence of summer campfires without the need for marshmallow-roasting. It is easy to prepare and can be tailored to suit dietary preferences or restrictions, making it a versatile snack for everyone. This delightful trail mix isn’t only incredibly simple to make, but it’s also a great option for parties, road trips, or just a cozy night in. The perfect snack offers a nostalgic taste reminiscent of childhood, bringing back memories of warm summer nights around the campfire.

The ingredients come together in a matter of minutes, and the result is a delicious blend of flavors and textures. Plus, it’s ready to eat immediately, or you can store it for later snacking. Treat yourself or share with friends, and experience the joy of s’mores in a whole new way.

Ingredients:
– Golden Grahams cereal
– Teddy Grahams or other graham crackers
– Mini marshmallows
– Chocolate chips or chocolate pieces (dairy-free if needed)
– Mini pretzels (optional)

Instructions:
In a large mixing bowl, combine equal parts of Golden Grahams and Teddy Grahams, followed by a generous handful of mini marshmallows and chocolate chips. If you’re using pretzels, toss them in for an added crunch.

Gently mix all the ingredients together until evenly distributed. For an extra touch, you can melt some chocolate and drizzle it over the mixture before letting it set, or simply serve as is, ensuring it’s mixed well.

Extra Tips:
To keep your S’mores Trail Mix fresh, store it in an airtight container at room temperature. Feel free to customize the proportions based on your personal taste, adding more of your favorite ingredients or even introducing nuts for an extra crunch.

For a festive twist, you might consider using seasonal chocolate types, such as peppermint for the holidays. Enjoy experimenting with flavors and creating your perfect snack blend!

Final Thoughts

When you think about convenient and delicious snacking options, S’mores Trail Mix stands out as a top choice. This versatile mix offers a variety of flavors and textures, bringing the beloved taste of s’mores into a form you can enjoy anytime, without the need for a campfire.

Key Benefits:

  • Variety: Different ingredients can replicate familiar s’mores flavors.
  • Customization: You can easily swap ingredients to meet dietary needs, such as choosing dairy-free chocolate or carob chips.
  • Texture: The combination of soft marshmallows, crunchy cereal, and smooth chocolate improves your snacking experience. Plus, you can choose from several options like dairy-free chocolate options to suit your preferences.
  • Ease of Preparation: Many recipes take less than 10 minutes to prepare.
  • Storage: Most mixes can be stored in airtight containers, making them perfect for future use.

Serving Suggestions:

  • Enjoy it as an after-school snack or a fun party treat.
  • Consider it a great companion for road trips or outdoor adventures.

FAQ

For anyone curious about S’mores Trail Mix, you’ll find a variety of common questions that can help you create the perfect blend.

Key Ingredients:
– Golden Grahams cereal
– Mini marshmallows
– Chocolate pieces
– Pretzels

Alternative Ingredients:
– Peanut Butter Puffins cereal
– Miniature marshmallows
– Dairy-free chocolate

Customization Options:
– Cereal: Teddy Grahams, Peanut Butter Puffins
– Nuts: Peanuts, almonds, sunflower seeds
– Dried Fruits: Unsweetened cherries, raisins
– Spices: Sea salt, cinnamon, nutmeg

Nutrition and Safety:
– Calories: 254, Total Fat: 6g, Sugar: 20g

  • Considerations: Use dairy-free chocolate for alpha-gal concerns
  • Potential Allergens: Peanuts, dairy

Preparation:
– Time: 5-10 minutes

  • No cooking required for most recipes; simply combine ingredients in a large bowl or zip-top bag. You can also add Golden Grahams cereal for a delightful graham cracker flavor that enhances the overall taste of the mix.

This guide guarantees you have all the necessary information to create your S’mores Trail Mix, accommodating dietary preferences while delivering a tasty snack that’s easy to prepare.

Simple Biryani Recipe – Flavorsome and Easy

Simple Biryani Recipe – Flavorsome and Easy

Is there anything more comforting than a steaming plate of biryani? You might think it’s a complicated dish reserved for special occasions, but in reality, a simple biryani recipe can transform your weeknight dinner into something extraordinary. By harnessing the vibrant flavors of marinated chicken and fragrant basmati rice, you’ll create a meal that’s both satisfying and straightforward. But what specific steps do you need to guarantee each bite is perfectly seasoned? Let’s investigate this easy yet flavorsome journey together.

Key Takeaways

  • Use fragrant basmati rice, marinated chicken, and a blend of spices to create a flavorful biryani.
  • Marinate chicken with yogurt and spices for at least 30 minutes to enhance taste.
  • Rinse and soak basmati rice for 30 minutes before boiling with whole spices for optimal texture.
  • Layer marinated chicken and partially cooked rice in a pot, then steam for even cooking.
  • Serve biryani with refreshing raita and tangy chutney to complement the rich flavors.

History

Biryani often captures your attention not just for its delightful flavors but also for its rich history. This iconic dish has a complex origin story rooted in centuries of cultural exchange.

  • Persian Roots: The name “biryani” comes from Persian words meaning “fried before cooking” and “rice.”

  • West Asian Influence: Biryani is generally accepted to have originated in West Asia, brought to India by various conquerors and traders.

  • Historical Legends: One legend suggests that Timur, the Turk-Mongol conqueror, introduced biryani to India in 1398. Additionally, the earliest references to biryani in South Asia point to its pre-Mughal origins, with various historians suggesting its introduction by traders and travelers.

The dish saw significant transformation during the Mughal Empire, when new flavors merged with local culinary traditions.

Mughal kitchens sparked a culinary evolution, creating a fusion of Persian and Indian flavors. Notable figures like the Nizams of Hyderabad and Nawabs of Lucknow developed their unique versions.

The earliest literary references to a rice dish resembling biryani appear in Tamil literature around 2 A.D.

As a result, biryani has become part of India’s cultural identity.

Today, it stands not just as a meal but as an emblem of unity, embodying the spirit of joy and celebration within Indian culinary heritage, making it beloved both locally and internationally.

Recipe

Simple Biryani Recipe

Biryani is a beloved dish that combines fragrant basmati rice with marinated chicken, spices, and aromatic herbs to create a delightful culinary experience. With its layers of flavor and enticing aroma, biryani is perfect for a family meal, special occasions, or even a weekend treat. The key to a great biryani lies in the marination of the chicken, the preparation of the rice, and the careful layering of flavors. In fact, Hyderabadi biryani is widely regarded as a staple in Indian cuisine.

In this simple biryani recipe, we’ll guide you through the steps to create a mouth-watering dish that boasts fluffy rice and tender, spiced chicken. The combination of yogurt, spices, and fresh herbs in the marinade enhances the dish, while the whole spices infused into the boiling water bring an extra dimension to the rice, making every bite a perfect blend of taste and texture.

Ingredients:
– 2 cups basmati rice
– 6 cups water
– 1 kg chicken, cut into pieces
– 1 cup yogurt
– 2 tablespoons ginger-garlic paste
– 1 tablespoon red chili powder
– 1 teaspoon turmeric
– 1 tablespoon garam masala
– 1 teaspoon cumin powder
– Salt to taste
– 2 tablespoons finely chopped cilantro
– 2 tablespoons finely chopped mint
– 2 green chilies, chopped
– 2 tablespoons lemon juice or vinegar
– 1 teaspoon cane sugar
– 2 large onions, sliced
– Whole spices (2 bay leaves, 4 cardamom pods, 2 cinnamon sticks, 1 teaspoon cumin seeds)
– Oil for cooking
– Saffron threads soaked in hot milk (optional)

Begin by rinsing the basmati rice thoroughly to remove excess starch, then soak it in water for 30 minutes. In a large pot, bring 6 cups of water to a boil and add whole spices to the water for flavor. Once boiling, add the soaked rice and cook until it’s about 70% done. Drain the rice and set it aside.

Meanwhile, prepare the chicken marinade by mixing yogurt, ginger-garlic paste, red chili powder, turmeric, garam masala, cumin, salt, cilantro, mint, chilies, lemon juice, and cane sugar. Marinate the chicken for at least 30 minutes.

In a large pan, heat oil and sauté bay leaves, cardamom, cinnamon, and cumin seeds. Add sliced onions and cook until golden brown. Then, cook the marinated chicken in the aromatic oil until tender.

For the final assembly, layer the cooked chicken and partially cooked rice, seasoning with fried onions and spices between the layers. If using saffron, drizzle it along with the milk over the top. Cover the pot and steam on low heat for about 20-30 minutes until the rice is fully cooked and has absorbed all flavors.

Extra Tips: To guarantee that your biryani turns out perfectly, don’t skip rinsing and soaking the rice; this helps achieve fluffy, separate grains. You can also add your favorite vegetables for a vegetarian twist, and don’t hesitate to adjust spices to match your preference.

When assembling the biryani, layering is essential, so take your time to make beautiful layers for the best flavor experience. Finally, biryani freezes really well, making it an ideal dish for meal prep; simply reheat when you’re ready to enjoy.

Final Thoughts

When planning your next meal, consider how a well-prepared biryani can improve the dining experience for you and your guests. This dish stands out not only for its rich flavors but also for its versatility in pairing with various side dishes.

Here are some suggestions:

  • Biryani Varieties: Complement your biryani with raita, chutney, and Indian curries like butter chicken and palak paneer.

  • Flavor Balance: Raita balances the heat of biryani, while chutney brings a tangy zest. Additionally, a creamy texture in dishes like palak paneer enhances the overall dining experience.

  • Texture Contrast: Indian curries add diverse textures to your meal.

Biryani is recognized as a complete meal on its own, but traditional accompaniments improve its cultural significance.

Experiment with regional variations to enrich your dining experience. Some popular combinations include:

  • Butter Chicken
  • Palak Paneer
  • Mirchi ka Salan

To guarantee you achieve the best results, focus on using aged basmati rice, marinating your proteins, and layering ingredients properly.

Ghee, rather than oil, can heighten the aroma.

Finally, allowing the biryani to rest before serving can improve its overall flavor and texture.

Enjoy the seamless blend of tradition and deliciousness that biryani offers!

FAQ

As you investigate the world of biryani, you might’ve some questions about preparing this flavorful dish. Here are some common inquiries and helpful answers:

Key Ingredients: The essential ingredients for biryani include bone-in chicken, basmati rice, and spices like cumin, coriander, garam masala, and turmeric. Don’t forget saffron and ghee for rich flavor, and fresh mint or cilantro for garnish.

Preparation Steps:
Marinate the chicken for better flavor.
– Cook the rice separately until it’s about 90% done; rinse and soak it beforehand to prevent stickiness.
– Layer hot chicken gravy and rice, ensuring even cooking. The process involves cooking techniques that require careful attention to timing and temperature to achieve the best results.

Common Mistakes:
Overcooking the rice can lead to mushiness.
– Always maintain a gentle heat during the final steaming, which should take 10 to 20 minutes.

Variations: You can use different types of peppers or store-bought biryani masala if needed. Consider adding fried cashews or raisins for extra texture.

With these tips, you’ll have the knowledge to prepare a delicious biryani that impresses family and friends!

Conch Peas Recipe – Delicious Caribbean Dish

Conch Peas Recipe – Delicious Caribbean Dish

You might think preparing Conch Peas is complicated, but it’s surprisingly straightforward. This dish not only embodies the essence of Caribbean cuisine but also offers a unique blend of flavors and textures that can enhance your dining experience. You’ll appreciate the tender conch and earthy pigeon peas that create a satisfying meal perfect for any occasion. Wondering how to achieve that perfect crispy crust on the conch while ensuring the peas are flavorful? Let’s investigate the steps and techniques that’ll help you create this delightful dish in your own kitchen.

Key Takeaways

  • The recipe features tender conch strips combined with hearty pigeon peas, showcasing diverse Caribbean flavors.
  • Begin by tenderizing conch and preparing a flavorful tempura batter for frying.
  • Sauté bacon, tomatoes, and onions, then add pigeon peas to enhance the dish’s richness.
  • Cook the rice with the pigeon peas and sautéed mixture for a complete meal.
  • Enjoy the dish at family gatherings or celebrations, highlighting its cultural significance.

History

The history of conch and peas in Caribbean cuisine reflects a rich tapestry of cultural blending and agricultural practices.

  • Conch:

  • Originally harvested by indigenous peoples in the Caribbean, conch became integral to their diets.

  • Over time, it transformed into a unifying ingredient across various cultures in the region.

  • Its versatility allows for preparation in numerous ways, showcasing the meat’s adaptability.

  • Conch symbolizes the Caribbean’s maritime heritage, deeply rooting itself in local identity.

  • Peas (particularly pigeon peas):

  • The Bahamian dish of peas and rice originated in the late nineteenth century during subsistence farming.

  • Early versions combined pigeon peas with cornmeal, later evolving with the introduction of rice from the American South.

  • It’s often prepared with meat or fish, reflecting local harvesting practices and is served as a mandatory component of Bahamian meals.

  • The dish embodies cultural significance, representing the blending of traditional farming with imported ingredients.

Both conch and peas showcase the Caribbean’s diverse culinary heritage, reflecting the essential role these ingredients play in community gatherings and social traditions.

Their preparation illustrates the region’s cultural preservation, offering economic opportunities for coastal residents.

Recipe

To create a delicious dish of Conch Peas, you’ll be combining the unique flavors of tender conch with hearty pigeon peas and aromatic seasonings. The preparation involves tenderizing the conch for ideal texture. This dish pays homage to the vibrant culinary traditions of the Caribbean, offering a delightful blend of ingredients that comes together beautifully. Notably, Crack Conch is recognized as a traditional Bahamian delicacy that showcases the rich culinary heritage of the region.

Begin by preparing your conch and pigeon peas. You’ll start with the essential steps of tenderizing the conch and making a flavorful tempura batter for frying. Meanwhile, the pigeon peas will be complemented with bacon and sautéed tomatoes, creating a rich and satisfying base for your rice. The result is a dish that isn’t only filling but also bursting with flavor, perfect for a family meal or a gathering with friends.

Ingredients:
– Tenderized queen conch flesh
– Pigeon peas
– Flour
– Egg
– Garlic powder
– Thyme
– Salt
– Black pepper
– Water
– Oil (for frying)
– Bacon (diced)
– Sliced tomatoes
– Onions
– Tomato paste
– Pepper (optional)
– Rice

Cooking Instructions:
Begin by pounding the queen conch with a meat mallet until tender and chop it into 2-inch strips. Prepare a tempura batter by whisking together flour, egg, garlic powder, thyme, salt, black pepper, and water to achieve a thick consistency. Coat the conch strips generously in the batter, then deep fry in hot oil until golden brown and crisp.

In another pan, fry diced bacon until golden, then add sliced tomatoes, onions, tomato paste, and thyme, sautéing until aromatic. Stir in pigeon peas along with 3 cups of water, bringing the mixture to a boil before adding the rice. Cover the pan and cook on medium heat for approximately 30 minutes, or until the rice is tender and has absorbed the liquid.

Extra Tips:
For an added layer of flavor, consider marinating the conch strips with fresh herbs like parsley and garlic before frying. You can also experiment with the texture of your rice by adjusting the liquid ratios based on the type of rice you’re using. If you’re seeking a creamier variation, incorporating coconut milk can enhance the dish further.

Don’t hesitate to investigate regional variations by adding your choice of spices or ingredients that resonate with your taste preferences!

Final Thoughts

Reflecting on the delightful combination of conch and pigeon peas, it’s clear that this dish captures the spirit of Caribbean culinary traditions. By merging these two significant ingredients, you not only create a flavorful meal but also celebrate a rich cultural heritage.

Here are key aspects of this dish’s importance:

  • Culinary Versatility: Conch showcases varied preparations, from fritters to stews, while pigeon peas serve as a hearty staple in many Caribbean households.

  • Cultural Identity: Both conch and peas symbolize regional pride, with conch often featured in community celebrations and pigeon peas representing local agricultural practices. Additionally, conch is known for its role in balancing marine ecosystems, underscoring its significance beyond just culinary uses.

  • Economic Relevance: Conch fishing supports many coastal families, illustrating how cuisine contributes to economic sustainability in the Caribbean.

When you enjoy conch and pigeon peas, you’re not just tasting a dish; you’re also engaging with the history and culture of the Caribbean.

The blending of these ingredients not only creates a mouthwatering experience but also connects you with the island communities that have cherished these foods for generations.

FAQ

If you have questions about conch peas, you’re not alone—many people find themselves curious about this intriguing dish. Here’s a closer look at the essentials of conch peas.

What are conch peas? They’re actually a type of cream pea, not related to the sea creature conch, often resembling lady peas.

Where do they come from? The name may confuse, as it doesn’t reference the Bahamian conch dish but signifies specific peas found in various Caribbean cuisines.

What are the basic ingredients? Typically, conch peas include:
– Pigeon peas or kidney beans
– Rice
– Seasonings

How should they be prepared?
– Soak peas overnight.
– Boil with onions and thyme until tender.
– Add rice and additional water, then season.
Coconut milk and spices improve the flavor. [Rice and peas are a staple in Jamaican households and evoke a deep connection to cultural roots.]

What variations exist?
Bahamian: Pigeon peas with bacon and tomato paste.
Jamaican: Kidney beans with coconut milk and scotch bonnet peppers.
Trinidadian: Known as “red bean pelau,” it combines red kidney beans and spices.

Gluten-Free Plum Cake Recipe – Sweet and Fruity

Gluten-Free Plum Cake Recipe – Sweet and Fruity

If you’re looking for a dessert that accommodates gluten sensitivities without sacrificing flavor, a gluten-free plum cake might be just what you need. This recipe strikes a balance between the sweet and tart notes of plums and a moist, tender cake that’s sure to impress. With a few adjustments, you can also investigate variations using other fruits to suit the season. But before you gather your ingredients, consider how these elements come together to create a truly unique experience that’s surprisingly simple yet inviting. Curious about how to achieve that perfect texture and taste?

Key Takeaways

  • Combine 1 ½ cups almond flour with 1 ½ cups gluten-free flour for a moist and versatile cake base.
  • Use 4-5 medium plums, arranged on top, to add sweetness and a fruity flavor.
  • Include warm spices like cinnamon and zest from one lemon to enhance the cake’s overall taste.
  • Prepare a light streusel topping using gluten-free flour, sugar, and butter for added texture and presentation.
  • Bake at 350°F for 45-60 minutes until the cake is golden brown and fragrant.

History

Plum cake has a rich history that spans centuries and continents, with origins tracing back to ancient civilizations that valued dried fruits for their longevity and flavor. Over time, these traditions evolved, particularly in Europe, where dried fruits became integral to holiday baking and celebrations.

Key historical points include:

  • Ancient Roots: Civilizations used dried fruits for their sweetness and preservation.

  • European Tradition: Plum cakes are commonly enjoyed during Christmas in England, often paired with mulled wine.

  • Regional Variations: In Germany, Zwetschgenkuchen highlights the plum season’s bounty, showcasing how moist and delicious gluten-free cake has been embraced.

In India, the history of plum cake began in 1883, when a British planter introduced it to local bakers, leading to unique adaptations.

These adaptations included local ingredients such as:

  • Cashew apples

  • Various banana types

  • Local brews instead of traditional brandies

Regions like Kerala have developed distinct plum cake traditions, while each area contributes its unique flavor aspects.

Kochi’s Pandhal Cafe is known for honey-soaked fruits, while Goa’s Baath Cake mixes semolina and coconut.

Each region’s innovations reflect their local ingredients and baking techniques, showcasing plum cake as a symbol of cultural heritage and community celebration.

Recipe

Gluten-Free Plum Cake is a delightful dessert that beautifully combines the sweet-tart flavor of plums with a moist, tender cake base. This recipe is perfect for those following a gluten-free diet and showcases the versatility of gluten-free flours in baking. Whether you’re serving it for a special occasion or enjoying it as a comforting treat, this cake is sure to impress with its inviting aroma and golden brown finish.

The addition of warm spices and a hint of citrus amplifies the flavor of the plums, making each bite a delicious experience. Additionally, seasonal fruits such as peaches or apples can enhance the flavor and texture of the cake, making it even more delightful.

As you prepare to make this fabulous cake, be certain to gather your ingredients and verify your oven is preheated to the right temperature. The plums can be substituted with different fruits depending on availability and your preference. This versatility means you can enjoy this cake any time of the year, tailoring it to seasonal fruits and flavors.

With a light streusel topping, this cake can be an impressive centerpiece for your dessert table.

Ingredients:
– 1 ½ cups almond flour
– 1 ½ cups gluten-free flour
– 1 tablespoon baking powder
– 1 teaspoon cinnamon
– ½ teaspoon salt
– ½ cup unsalted butter, softened
– 1 cup sugar
– 2 large eggs
– 1 teaspoon vanilla extract
– Zest of 1 lemon
– 4-5 medium plums, pitted and sliced
– ¼ cup sugar (for plums)
– 1 teaspoon cinnamon (for plums)
– Optional: Streusel topping ingredients (¼ cup gluten-free flour, ¼ cup sugar, ½ teaspoon cinnamon, ½ cup unsalted butter, room temperature)

To make the Gluten-Free Plum Cake, begin by preheating your oven to 350°F and preparing your pan by lightly spraying it with nonstick cooking spray and lining the bottom with parchment paper.

In a mixing bowl, whisk together the almond flour, gluten-free flour, baking powder, cinnamon, and salt. In a separate bowl, cream the softened butter with sugar using a mixer until light and fluffy, then add eggs one at a time, mixing in the vanilla extract and lemon zest.

Gradually incorporate the dry ingredients into the wet mixture until just combined. Carefully transfer the batter to the prepared pan, smoothing out the top with a spatula.

Prepare the plums by washing, drying, and either cutting them in half or quartering. Toss the plums with sugar and cinnamon, and layer them cut side down on top of the batter. If desired, prepare a streusel topping and sprinkle it on top.

Bake for about 45-60 minutes or until the cake is golden brown and a toothpick inserted in the center comes out clean.

When making this Gluten-Free Plum Cake, consider using different fruits based on what’s in season or your personal preferences, such as peaches, nectarines, or blueberries.

If using a streusel topping, keep an eye on the cake towards the end of baking to avoid over-browning. For best results, allow the cake to cool completely before removing it from the pan, as this will help it hold its shape.

Dust with powdered sugar just before serving for an elegant finish, and enjoy your delicious, homemade gluten-free dessert!

Final Thoughts

As you savor the last bites of your Gluten-Free Plum Cake, keep in mind the joy of baking without gluten. This delightful cake not only showcases the rich flavors of plums but also provides a safe alternative for those with gluten sensitivities.

Here are the key considerations to remember for successful gluten-free baking:

  • Flour Selection: Use all-purpose gluten-free flours for a versatile base. Almond flour adds moisture, while buckwheat flour improves texture.

  • Leavening Agents: Baking powder is essential for proper rising. Combining it with baking soda can offer extra lift.

  • Flavor Enhancements: Incorporate lemon zest and juice for freshness and cinnamon for warmth.

Remember to address common challenges by carefully selecting your ingredients and techniques:

  • Texture: Achieve a light texture by using the right flour combinations.

  • Baking Techniques: Follow the “all-in” method, and avoid overmixing the batter.

Lastly, ensuring storage conditions will keep your cake fresh. Cool it completely before serving, and store it properly to maintain its delightful taste and texture. This cake can also be made with various fruits like apples, pears, cherries, and berries, offering versatility for different preferences.

Enjoy the satisfaction of a well-baked, gluten-free treat that’s suitable for everyone!

FAQ

Looking for answers to your baking questions?

Here are some common FAQs about making gluten-free plum cake:

1. What flour options can I use?
You can use almond flour, gluten-free all-purpose flour, or a combination with buckwheat flour. Gluten-free self-raising flour is also a good choice, but ensure your gluten-free flour contains xanthan gum for better texture.

2. What sugar alternatives can I try?
Granulated white sugar is standard, but you can substitute coconut sugar if you prefer a different flavor.

3. Are there dairy-free options?
Yes, you can use non-dairy milk and adjust recipes to be dairy-free.

4. How should I prepare the pan?
Grease and line a 9-inch cake pan or use nonstick cooking spray for springform pans.

5. What’s the ideal baking time?
Bake your cake at 350°F for 45-60 minutes, cooling it for at least 10 minutes before removing it from the pan.

6. Can I add other fruits?
Absolutely! Consider figs, peaches, or blueberries to improve the flavor, and feel free to mix different plum varieties.

These tips should help you create a delicious gluten-free plum cake. Enjoy!

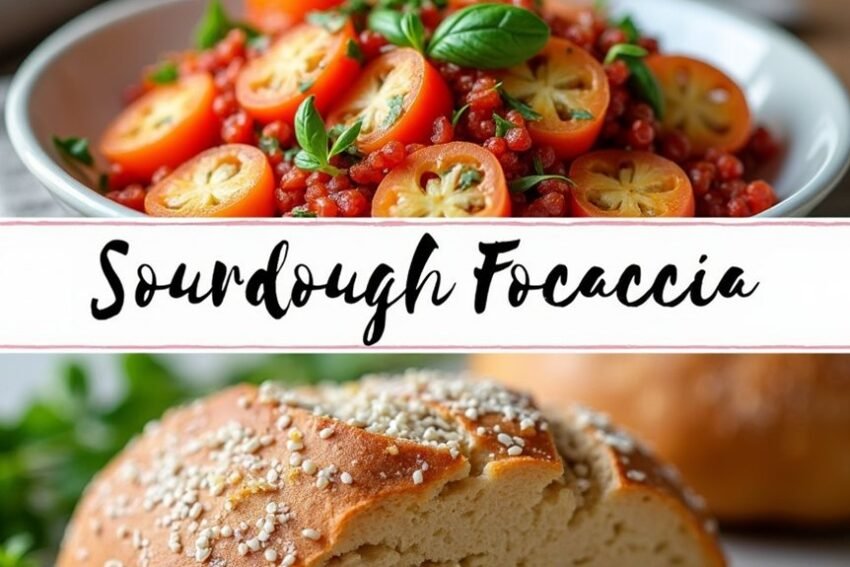
Sourdough Focaccia Recipe – Crispy on the Outside, Soft Inside

Sourdough Focaccia Recipe – Crispy on the Outside, Soft Inside

Sourdough focaccia has roots that stretch back centuries, intertwining culture and culinary tradition. If you’ve ever craved a bread with a perfect contrast of crispy crust and pillowy interior, this could be your go-to recipe. The process involves intricate techniques, like using a well-fed sourdough starter and an intentional fermentation process, which raises both flavor and texture. You might wonder how to achieve that signature dimpling and what toppings work best to complement the rich taste. Let’s examine these details to reveal the secrets behind this beloved bread.

Key Takeaways

  • Use an active sourdough starter and high gluten bread flour for a light, airy texture that results in a crispy exterior.
  • Incorporate sufficient olive oil for added flavor and a crisp crust; consider using 30-70g for optimal results.
  • Allow for a long fermentation of about 12 hours to develop deep flavors and enhance the dough’s texture.
  • Utilize the stretch and fold technique during bulk rise to strengthen gluten and ensure even texture throughout the bread.
  • Monitor proofing time carefully to achieve desired lightness; aim for a jiggly dough before dimpling and baking.

History

Focaccia’s origins date back over two millennia, with roots likely tracing to the Etruscans of North Central Italy or Ancient Greece. This ancient flatbread has a rich history, shaped by various cultures and practices.

Here are some key points about its evolution:

  • Early Variations: Similar flat unleavened breads appeared throughout the Middle East, Turkey, Greece, Italy, France, and Spain, highlighting a shared culinary tradition.

  • Roman Influence: The Romans spread focaccia via their empire, introducing it to France and Spain, integrating it into local gastronomic customs.

  • Baking Practices: Known as “panis focacius” or “hearth bread,” focaccia was traditionally baked in coals or on hot stones, using basic ingredients like flour, olive oil, water, yeast, and salt. Culinary traditions have continued to evolve as focaccia recipes adapted to modern tastes.

  • Regional Variations: Each region adapted focaccia, resulting in numerous forms, such as Spain’s pan de hogaza and France’s fugasse.

  • Cultural Role: In medieval times, the Catholic Church used focaccia during religious festivals, emphasizing its significance in tradition.

Over the centuries, focaccia transformed from simple bread to a cherished staple, reflecting diverse culinary practices and cultural significance across regions.

Recipe

Sourdough Focaccia Recipe

Sourdough focaccia is an exceptionally versatile and flavorful bread that can raise any meal or serve as a delicious snack on its own. Utilizing an active sourdough starter, this recipe generates a light, airy dough that’s improved by the use of olive oil, ensuring a rich flavor and a delightful texture. The fermentation process not only contributes to a distinctive sourness but also enhances the dough’s overall structure, creating a perfect canvas for a variety of toppings. The dough benefits from a long fermentation time, allowing for deep flavor development that results in a chewy and tender texture.

This recipe provides a straightforward way to create focaccia that’s crispy on the outside and soft within, making it ideal for sandwiches or to accompany soups and salads. The dimensions of the baking tray make it easy to handle, allowing you to bake a generous amount at once. Following these instructions will lead you towards producing a standout focaccia that you can enjoy fresh from the oven.

Ingredients:
– 100-115g active sourdough starter
– 400-459g water
– 500g high gluten bread flour (or a mix of all-purpose and high protein bread flour)
– 10-13g salt
– 30-70g olive oil (for topping and dimpling)
– Toppings: fresh herbs (like rosemary), sea salt, roasted garlic, tomatoes, capers, or olives (optional)

In a large mixing bowl, combine the active sourdough starter with the water, flour, and salt, mixing until there are no dry bits left. Allow the dough to rest for about 30 minutes before kneading gently to develop gluten.

Cover the bowl with a damp cloth, and let it ferment at a warm temperature (78-80°F) for about 12 hours or overnight. Once the dough has risen and is bubbly, gently spread it onto a greased 9×13 inch baking tray, dimpling the surface with your fingers, and drizzle with olive oil.

Add your desired toppings and let it proof for another 2-3 hours until it’s jiggly and puffy. Preheat your oven, then bake the focaccia for about 25 minutes or until golden brown and crispy.

When cooking focaccia, make sure to adjust the water content based on the flour’s absorptive quality, as it may differ. If you want to improve the flavors, consider adding herbs to the dough during mixing or experimenting with different toppings beyond the traditional rosemary.

Final Thoughts

When you’re ready to serve your homemade sourdough focaccia, take a moment to appreciate the process that led to its creation.

You’ve engaged in a rewarding journey of fermentation, texture, and flavor development, bringing together the elements for a delightful bread. To guarantee you achieve the best results, remember these key practices:

  • Autolyse: Allow the flour and water mix to rest for an hour. This improves hydration and overall dough texture.

  • Second Rise: Let the dough rise until it has doubled, promoting an airy structure.

  • Dimpling and Toppings: Dimpling the dough creates pockets and pressing in toppings prevents them from falling out during baking.

  • Preheated Oven: Bake at 200°C (392°F) for about 30 minutes for that golden, crispy finish. Additionally, incorporating a long, slow rise method into your preparation can greatly enhance the flavor profile.

Keep in mind the essential ingredients—active sourdough starter, bread flour, and sufficient water are critical to achieving your desired texture.

Don’t forget about storage; cooling on a wire rack prevents unwanted moisture accumulation.

With these practices in place, you can enjoy a delicious, homemade sourdough focaccia that’s truly a labor of love.

FAQ

If you have questions while making sourdough focaccia, you’re not alone! Here are some common queries along with their answers to help you achieve the finest results.

Bulk Rise: This process develops the dough’s gluten and flavor. Aim for 4 to 8 hours at room temperature for ideal results. A longer bulk rise enhances the flavor of the dough.

Stretch and Fold: Use this technique to evenly distribute yeast and build gluten, enhancing texture.

Proofing: Let the dough rest in a warm, draft-free place until it’s light and jiggly. This is essential for texture and may take several hours.

Poking and Dimpling: Dimple the dough with your fingers before baking to create holes and guarantee even spreading.

Key Ingredients: Use an active, fed sourdough starter, bread flour or unbleached all-purpose flour, room temperature water, coarse kosher or sea salt, and regular olive oil.

Common Issues:

  • Underproofing: Extend proofing time if necessary.

  • Overproofing: Monitor closely to avoid density.

  • Crispiness: Bake at 425°F, ideally on a baking stone.

Buttery Iced Biscuits Recipe – Perfect Breakfast or Snack

Buttery Iced Biscuits Recipe – Perfect Breakfast or Snack

When you think about breakfast or snack options, buttery iced biscuits might not be the first thing that comes to mind, but they should be. With their rich flavor and melt-in-your-mouth texture, these biscuits offer a perfect balance of simplicity and indulgence. You’ll find that whipping them up requires just a handful of ingredients, making them accessible for anyone. As you consider the potential additions to really enhance your biscuits, you’ll begin to appreciate how they can fit seamlessly into any part of your day. Curious about how to get started?

Key Takeaways

  • This buttery iced biscuits recipe includes simple ingredients like unsalted butter, icing sugar, and plain flour, perfect for breakfast or a snack.
  • Chilling the dough for at least one hour ensures a tender and light texture, enhancing the biscuit’s quality.
  • Bake the biscuits at 160C fan for 12 minutes to achieve a golden finish and delightful taste.
  • Serve warm with toppings like strawberries or ice cream for a delicious treat that everyone will enjoy.
  • Store leftover biscuits in an airtight container to maintain freshness and enjoy them as a quick snack later.

History

The history of biscuits is as rich and layered as their delightful texture. They originated in medieval Europe, deriving from the Latin word “biscotus,” signifying twice-baked. Early on, Roman soldiers relied on biscuits as part of their rations, enjoying their durability.

In 1588, these baked goods made their way to Great Britain, where they became essential for sailors in the Royal Navy. As biscuits traveled to colonial America, their quick baking time and minimal ingredients made them a staple. In the Southern colonies, the combination of successful wheat harvests, buttermilk, and lard improved their flavor and texture. This adaptation showcased the importance of fresh flour in biscuit-making, a key factor contributing to their unique Southern style.

Consider these notable developments:

  • Unleavened Origins: The earliest biscuits lacked leaveners until the mid-19th century.
  • Southern Flour: The introduction of Southern flour led to tender, feather-light biscuits.
  • Innovative Tools: The spring-loaded biscuit cutter, invented by Alexander Ashbourne in the late 1800s, refined biscuit-making.
  • Convenient Options: The 20th century saw the emergence of pre-mixed biscuit mixes and refrigerated dough, increasing accessibility.

Through these advancements, biscuits grew from simple military rations into beloved culinary delights in America.

Recipe

Buttery Iced Biscuits Recipe

These buttery iced biscuits are a delightful treat perfect for any occasion. With their soft, crumbly texture and sweet icing, they’re sure to be a hit with family and friends. The dough is simple to prepare, requiring just a few basic ingredients, and can be easily customized with different shapes and decorations to suit your celebration or mood. The recipe yields a large batch, making it ideal for sharing (especially during cozy, rainy weekends).

Whether you’re enjoying them with a cup of tea or serving them at a gathering, these biscuits are a crowd-pleaser. To start off, you’ll need to make the butter biscuit dough, which entails creaming together softened butter and icing sugar until light and fluffy. After incorporating the egg yolk and vanilla, you’ll sift in the flour and mix until a firm dough forms. Once chilled, you can roll out the dough and cut it into your desired shapes, paving the way for the delicious baking process.

Ingredients:
– 250g softened unsalted butter
– 140g icing sugar
– 1 tsp vanilla extract
– 1 large free-range egg yolk
– 375g plain flour
– 1/2 cup powdered sugar (for icing)
– 1 to 2 tablespoons milk (for icing)
– 1/2 teaspoon pure vanilla extract (for icing)

To prepare the biscuits, begin by preheating your oven to 160C fan/350F/Gas Mark 4 and lining your baking sheets with parchment paper. Beat the softened butter with icing sugar until it becomes very pale and fluffy.

Add in the vanilla extract and egg yolk, mixing well. Gradually sift in the plain flour and combine until you have a firm dough. Wrap the dough in cling film and refrigerate for at least one hour.

Once chilled, roll the dough to a 1/4″ thickness and cut out shapes. Place the cut biscuits onto the lined baking sheets and bake in the preheated oven for about 12 minutes, until they’re pale golden. Allow the biscuits to cool on a wire rack before icing them with your prepared mixture of powdered sugar, milk, and vanilla.

When it comes to icing and decorating your biscuits, remember to let them cool fully before adding the icing to prevent it from melting. For the icing, adjust the consistency by adding more milk if needed.

Feel free to get creative with your decorations; use contrasting colored icing, sprinkles, or edible glitters to make your biscuits stand out. Finally, store any leftovers in an airtight container to maintain their freshness, and enjoy these delicious treats as a delightful snack or breakfast option!

Final Thoughts

Enjoying buttery iced biscuits can improve any gathering or meal. Their versatility makes them an excellent choice for various occasions. You can serve them with an array of toppings such as strawberries, ice cream, or honey, or pair them with savory dishes like bacon or sausage for breakfast. They even complement soups and chilis as a hearty side.

To achieve the ideal biscuit, keep a few key points in mind:

  • Quality Ingredients: Use cold butter and high-quality flour for the best texture. Additionally, you might consider using buttermilk for tenderness to enhance flavor.

  • Handling and Storage: Minimize dough handling to keep the butter cold. Store unused dough in the refrigerator or freezer, and feel free to make biscuits in advance.

  • Serving Suggestions: Enjoy them with butter and jam for a simple treat or use them as a base for delightful desserts, like strawberries and cream.

For maximum freshness, serve the biscuits warm, ideally right after baking, though they can be reheated.

FAQ

Questions often arise when baking buttery iced biscuits, and addressing them can simplify your baking experience. Here are some common FAQs that can help:

Butter Handling:

  • Use room temperature butter for easy mixing and a creamy texture.

  • If you want flaky biscuits, keep in mind that cold butter is essential.

  • You can use either unsalted or salted butter. European butter adds extra saltiness.

Icing and Sugar:

  • Always sift icing sugar to prevent lumps in your icing.

  • For a smooth icing, use warm water or lemon juice.

  • Caster sugar can help achieve a smoother texture.

Baking Techniques:

  • Chill your dough to make it easier to handle.

  • Roll out dough thinly for even baking and consistent texture.

  • Gather and re-roll scraps effectively to minimize waste. Additionally, baking during the first weekend of December is a popular tradition in German Christmas and can inspire more festive baking.

Ingredient Choices:

  • Improve flavor with mixed spices or vanilla extract.

  • Use buttermilk or milk for moisture.

  • Low-protein flours help keep biscuits light and fluffy.