Category: Dessert Recipes

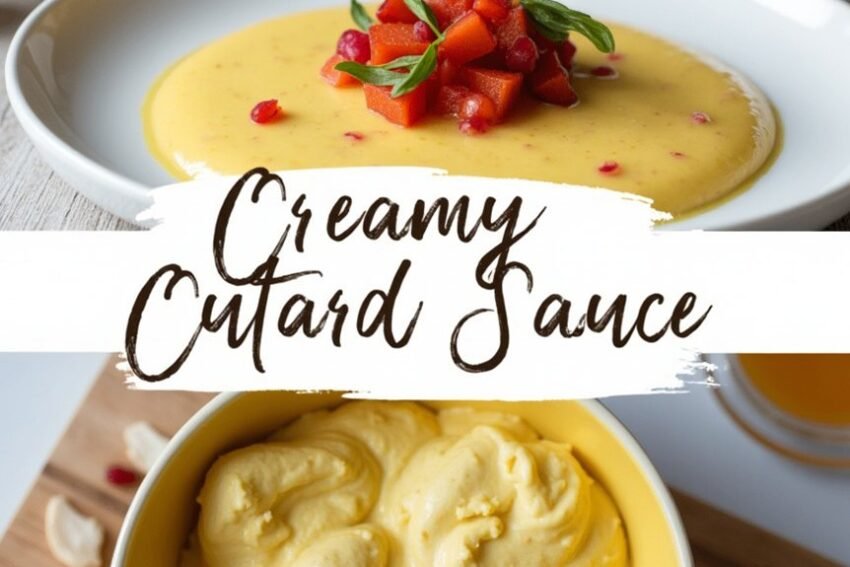
Creamy Custard Sauce Recipe – Perfect for Desserts

Creamy Custard Sauce Recipe – Perfect for Desserts

Imagine serving a slice of rich chocolate cake topped with a smooth, creamy custard sauce—it transforms a simple dessert into something truly indulgent. You might wonder what makes this sauce such an essential companion for various desserts. It’s not just about the taste; it’s the texture and versatility it adds that raise your culinary creations. As you investigate the nuances of crafting the perfect custard, you’ll uncover tips and techniques that can improve your overall dessert experience, making every bite a memorable one. What’s the secret behind achieving that ideal consistency?

Key Takeaways

  • Combine 500ml whole milk, 3 egg yolks, and 30g sugar in a saucepan for a rich base.
  • Gradually whisk heated milk into the egg mixture to ensure a smooth texture.
  • Cook over low to medium heat, stirring constantly until the sauce thickens.
  • Optionally add 1/2 teaspoon vanilla extract and 2 tablespoons flour for extra flavor and thickness.
  • Serve warm with desserts like apple cake or chilled with trifle for a delightful experience.

History

From ancient Rome to modern kitchens, custard has a rich and varied history that reflects culinary evolution across centuries. You might be surprised to learn that custard’s early beginnings can be traced back to ancient Rome, where it was known as “custos” or “crustardes.” During the Middle Ages, custard often filled pies and tarts, developing as it spread across Europe. The French added spices like cinnamon and nutmeg, enhancing its flavor. One significant cooking technique that has endured through time is the use of a double boiler to achieve a smooth, creamy custard.

Key historical points include:

  • Custard Tarts: Gained popularity, often featuring fruits like apples and cherries.
  • Renaissance Influence: European navigators transported custard to the New World, leading to adaptations with local ingredients.
  • Innovations in Baking: The development of individual custard cups and the use of hot water baths improved preparation techniques.

Recipe

Making a creamy custard sauce is a rewarding process that yields a deliciously versatile treat, perfect for drizzling over desserts or enjoying on its own. The foundation of a great custard lies in the careful combination of egg yolks, sugar, and whole milk, which when cooked gently, transforms into a velvety sauce. This recipe walks you through achieving the perfect consistency while guaranteeing rich flavors shine through with the addition of vanilla.

Homemade custard allows for customizable sugar levels for personal preference, offering healthier choices compared to ready-made options that are often overly sweet. This custard sauce can be served warm or chilled, making it an ideal addition to many desserts, such as cakes, puddings, or trifles. With a few simple ingredients and careful technique, you can master the art of custard and impress your family and friends with your culinary prowess.

Ingredients:
– 500ml whole milk
– 3 egg yolks
– 30g sugar
– 2 tablespoons flour (optional)
– 1/2 teaspoon vanilla extract

In a saucepan, heat the whole milk over medium heat until it’s just under boiling, stirring constantly to prevent scorching. Meanwhile, in a separate bowl, beat the egg yolks and whisk in the sugar and flour (if using) until smooth.

Once the milk is heated, gradually pour it into the egg mixture while whisking vigorously to temper the eggs. Strain the combined mixture through a fine-mesh sieve back into the saucepan. Cook over low to medium heat, stirring constantly until the sauce thickens and coats the back of a spoon.

Remove from heat and stir in the vanilla extract. If necessary, strain again to remove any lumps before allowing it to cool or refrigerating it until ready to serve.

For best results, confirm that you whisk constantly while cooking to prevent the custard from becoming grainy or developing lumps. If you want to add different flavor profiles, consider incorporating chocolate, lemon zest, or even coconut.

You can prepare the custard a day in advance and refrigerate it, then gently reheat before serving. Enjoy the creamy richness and versatility of your homemade custard sauce!

Final Thoughts

Creating your own creamy custard sauce opens up a world of delicious possibilities for improving your desserts. This versatile sauce pairs beautifully with various sweet treats, including:

  • Warm desserts like apple cake and bread pudding
  • Chilled desserts such as trifle
  • Fresh fruit
  • Cakes, including pound cake
  • Cobblers and crisps

To boost your sauce, consider exploring diverse flavors. You can easily enrich the custard with:

  • Chocolate chips or a chocolate hazelnut spread for chocolate lovers
  • Coconut, chopped nuts, or dried fruit for added texture
  • Lemon zest or juice for a revitalizing twist
  • Spices like cinnamon or nutmeg for warmth

When preparing your custard sauce, remember it can be made ahead of time and stored in the fridge for 3-4 days. Additionally, many custard desserts include classic favorites like Crème Brûlée and Crème Caramel, showcasing the versatility of custard in various forms.

However, handle it gently if reheating to avoid curdling. Always reheat over low heat or using a double boiler, and don’t boil.

Straining the sauce before serving will guarantee a smooth, velvety texture. Aim for the right thickness by adjusting your cooking time, and enjoy the delightful improvements this sauce brings to your desserts!

FAQ

If you’re new to making custard sauce or have some questions about the process, this FAQ section is here to help.

Key Ingredients:
– Milk or cream
– Egg yolks
– Sugar
– Thickener (flour or cornstarch)
– Vanilla extract

Preparation Tips:
– Heat the milk gently until steaming, but not boiling.
– In a separate bowl, whisk the egg yolks and sugar until thickened.
– Slowly add the heated milk to the egg mixture, whisking constantly to prevent scrambling. This recipe utilizes common ingredients found at home, making it accessible for everyone.

Cooking and Thickening:
– Cook over low heat, stirring constantly until the mixture thickens and coats the back of a spoon.
– To guarantee a smooth texture, strain through a sieve into a clean bowl.

Cooling and Storing:
– Cool the custard by placing the bowl in ice water and continue whisking until fully cooled.
– Store the custard in the refrigerator until ready to use.

Common Mistakes:
– Avoid letting the mixture boil, which can cause scrambling.
– Always whisk constantly to achieve even cooking.

With these guidelines, you’ll be well on your way to mastering creamy custard sauce!

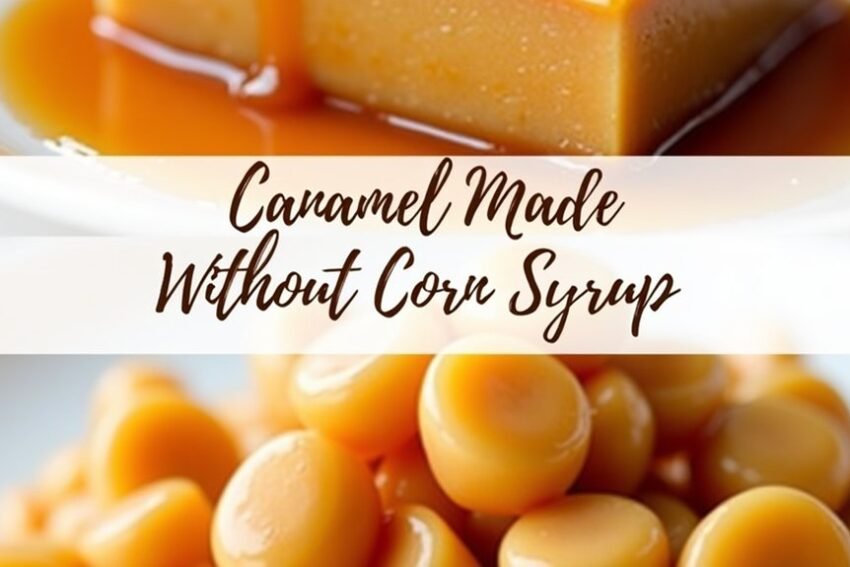
Caramel Made Without Corn Syrup Recipe

Caramel Made Without Corn Syrup Recipe

Caramel can either be a sticky, artificial mess or a rich, velvety delight made with natural ingredients. You might think corn syrup is a must for that perfect texture, but it’s entirely possible to achieve a deep flavor without it. Start with the basics, and you’ll soon uncover how simple it is to whip up a homemade batch that enhances your desserts. Intrigued? You’ll want to know the step-by-step process that makes this indulgent treat not just a dream, but a reality.

Key Takeaways

  • Combine sugar, brown sugar, honey, butter, and salt for a flavorful caramel without corn syrup.
  • Monitor the temperature using a thermometer; aim for 220-230°F for proper consistency.
  • Stir consistently during cooking to prevent burning and ensure even heating.
  • Allow the caramel to cool completely before cutting or handling to achieve the right texture.
  • Optional: Add vanilla extract for enhanced flavor in your homemade caramel.

History

  • Medieval Times: Caramel first surfaces as a sweet treat.

  • 19th Century: Industrial production begins, boosting its popularity.

  • 1900s: Corn syrup becomes a staple in many recipes.

  • 1715-1725: Usage documented in Spain, France, and England.

  • 1400s: Techniques for sugar crystallization develop.

The production methods evolved, from artisanal to industrial. Modern caramel is produced as a sauce and ingredient variations, such as milk and sugar beet juice, considerably impacted texture and flavor.

This rich history showcases how caramel became a beloved ingredient worldwide.

Recipe

Caramel Recipe Without Corn Syrup

Creating homemade caramel without corn syrup isn’t only possible but can yield a deliciously rich and indulgent treat. This recipe utilizes pure cane sugar, unsalted butter, and fresh cream to create a smooth and chewy caramel that’s perfect for drizzling over desserts or enjoying straight from the pan. Gluten-free versions can be made easily by verifying your ingredients do not contain any gluten.

The process may seem intimidating, but with the right techniques and a little patience, you can achieve a beautiful caramel texture that rivals any store-bought version.

To start making your caramel, prepare your cooking space by lining a baking pan with parchment paper. This step guarantees that once the caramel sets, it won’t stick, making it easier to cut into squares or pieces.

Gather all your ingredients—a simple yet effective combination—and get ready to transform them into a luscious, homemade caramel treat.

Ingredients:
– 1 cup pure cane sugar
– 1/4 cup unsalted butter
– 1/2 cup fresh cream
– 1/4 teaspoon sea salt
– 1 teaspoon vanilla extract (optional)

Cooking Instructions:
In a medium saucepan, combine the sugar and butter over medium heat, stirring continuously until the mixture is melted and starts to turn a golden brown color.

Gradually, add the fresh cream and continue to stir until the mixture is well combined and smooth. Use a candy thermometer to monitor the temperature and cook until the caramel reaches about 240°F, or the soft ball stage.

Once it reaches the desired consistency, quickly remove it from the heat and stir in the sea salt and vanilla extract if using. Carefully pour the caramel into the prepared baking pan and let it cool completely at room temperature before cutting.

Extra Tips:
When making caramel, be sure to monitor the temperature closely, as it can quickly go from perfectly cooked to burnt.

Stirring continuously helps prevent sticking and burning, securing a smooth consistency. If you notice any crystallization during cooking, don’t panic; simply add a small amount of water and continue stirring until it resolves.

For an extra touch, consider sprinkling sea salt on top of the caramel before it fully sets for a delightful sweet and salty contrast.

Final Thoughts

While making caramel without corn syrup may seem intimidating at first, the rewards of mastering this technique are well worth the effort. Successfully creating smooth, rich caramel hinges on a few essential practices.

Key Considerations for Success:

  • Monitor Temperature: Use a candy thermometer to avoid crystal formation and burning. Cooking to the right temperature ensures achieving the firm ball stage.

  • Be Patient: Constant attention is necessary, as rushing can lead to failure.

  • Choose Quality Ingredients: Opt for pure cane sugar and fresh cream for improved flavor.

  • Avoid Shortcuts: Never raise the heat to speed up the process.

Common Challenges:

  • Crystal Formation: Watch for crystals, as they can ruin the texture.

  • Seizing: Incorrect ingredient ratios can cause unexpected seizing.

  • Burning: High heat is your enemy; keep it low and slow.

Tips for Consistency:

  • Stir Constantly: Consistent stirring helps maintain even heating.

  • Cool Quickly: Using an ice bath prevents overcooking.

FAQ

Have questions about making caramel without corn syrup? You’ve come to the right place! Here’s a quick FAQ to help you navigate the process.

What ingredients do I need?
– Sugar
– Brown sugar or pure cane sugar
– Honey or sweetened condensed milk
– Butter (consider allergy-friendly options like Earth Balance)
– Salt, and optional vanilla extract

Why should I avoid corn syrup?
Using alternatives like honey or pure cane sugar can make your caramel more natural and flavorful. Additionally, using natural sweeteners can enhance the overall taste of the caramels.

How long does it take to cook?
Cooking times generally range from 10 to 25 minutes, depending on your desired consistency.

Do I need a thermometer?
Yes, a candy thermometer is vital. Aim for a temperature of 220-230 degrees.

Why is constant stirring important?
Stirring helps prevent burning and guarantees even heating, which is fundamental for caramel’s texture.

How do I know when it’s ready?
The mixture should cool and set before you cut or handle it. Patience is key!

With these tips, you’ll confidently make delicious caramel without corn syrup. Happy cooking!

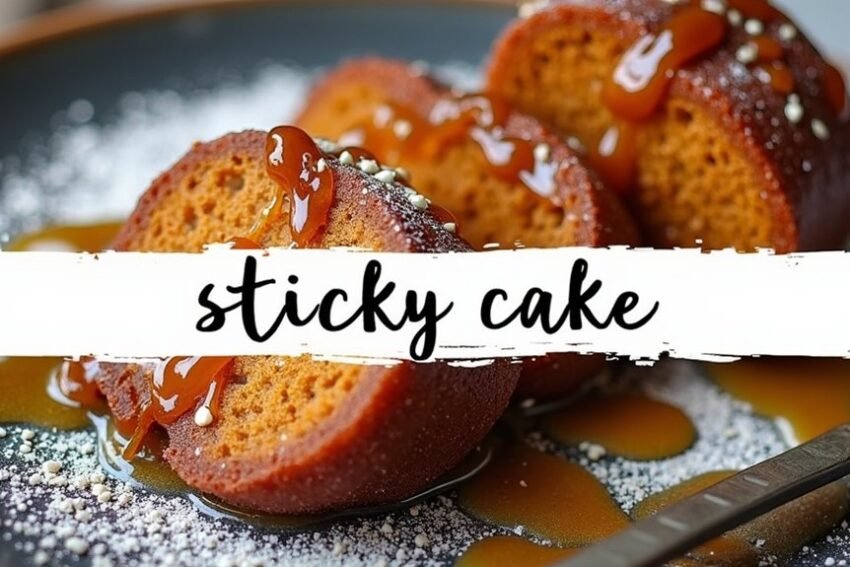
Sticky Cake Recipe – Sweet & Moist Delight

Sticky Cake Recipe – Sweet & Moist Delight

Did you know that nearly 80% of people consider dessert the best part of a meal? If you’re part of that majority, then you’ll want to pay attention to the sticky cake recipe that promises to be a sweet and moist delight. This treat, often intertwined with rich history and superb flavor profiles, sets itself apart with its unique combination of ingredients. As you investigate how to create this indulgent dessert, you’ll uncover techniques and tips that enhance it to unforgettable heights. What makes it truly special might surprise you.

Key Takeaways

  • Use 1 cup of chopped medjool dates soaked in boiling water for natural sweetness and moisture in the sticky cake.
  • Combine ½ cup softened butter with ¾ cup brown sugar, beating until light and fluffy for a rich batter.
  • Incorporate 2 large eggs one at a time, mixing thoroughly for a smooth and cohesive cake mixture.
  • Bake at 350°F for 22-25 minutes, checking doneness with a toothpick to ensure a moist texture without overbaking.
  • Serve warm with a generous drizzle of toffee sauce for an extra sweet and moist experience.

History

Tracing its roots through various claims and stories, sticky toffee pudding emerged as a beloved British dessert in the post-World War II era. Its origins are still disputed, with several regions vying for recognition.

Key points include:

  • Post-War Invention: The dessert likely originated during a time of food rationing when people sought comforting indulgences.

  • Canadian Influence: Some believe sticky toffee pudding’s inspiration came from the Canadian “brown Betty,” which features dates and a toffee sauce.

  • Sharrow Bay Connection: Francis Coulson and Brian Sack helped popularize the pudding in 1948 at Sharrow Bay Country House Hotel in the Lake District, where it evolved into its recognizable form.

  • Cumbrian Claims: Different stories suggest it was first served in locations like the Gait Inn in Ullswater or even at the Udny Arms Hotel in Scotland.

As sticky toffee pudding evolved, it incorporated local and international influences, reflecting the culinary changes of British cuisine. The pudding’s rich flavor comes primarily from the use of dates, a once-uncommon ingredient in traditional British cooking.

It’s now a cultural icon, known not just in the UK but also in North America, symbolizing a rich tradition rooted in comfort, indulgence, and community.

Recipe

Sticky Cake Recipe

This sticky cake is a delightful dessert that combines the rich flavor of medjool dates with a luscious toffee sauce, creating a warm, comforting treat ideal for any occasion. Perfect for serving to guests or enjoying with family, each bite is a heavenly mix of sweetness and texture. Thanks to the moistness from the dates and the warm toffee drizzle, this cake promises to be a showstopper. The cake incorporates dates for natural sweetness that truly enhance its unique flavor profile.

To start, you’ll prepare a simple batter that comes together quickly and easily. The key is to combine your ingredients in a specific order to guarantee a light and fluffy cake. After baking, serve it with a warm toffee sauce that adds an extra indulgent touch. Whether you choose to serve it with custard, ice cream, or whipped cream, this cake is guaranteed to impress.

Ingredients:
– 1 cup chopped medjool dates
– 1 cup boiling water
– ½ cup softened butter
– ¾ cup brown sugar
– 2 large eggs
– 1 teaspoon baking soda
– 1 ½ cups all-purpose flour
– 1 teaspoon baking powder
– ½ teaspoon salt
– ½ to ¾ cup heavy whipping cream
– ¼ cup butter (for toffee sauce)
– ¾ cup brown sugar (for toffee sauce)
– Pinch of salt (for toffee sauce)
– 1 teaspoon vanilla extract

Instructions:
Begin by combining the chopped medjool dates with boiling water in a bowl, allowing them to sit for 5 minutes.

In a separate bowl, beat the softened butter and brown sugar until the mixture is light and fluffy, then add the eggs one at a time.

Pulse the date mixture and mix in the baking soda before folding it into the batter.

Sift together the flour, baking powder, and salt, then gently stir the dry ingredients into the batter until just combined.

Pour the batter into a greased 12-cup muffin tin or an 8-inch square baking dish, spreading it evenly.

Bake at 350°F for 22-25 minutes for the square pan or 18-20 minutes for muffin tins.

Once baked, check for doneness with a toothpick.

While the cake cools slightly, prepare the toffee sauce by combining heavy whipping cream, butter, brown sugar, and a pinch of salt in a saucepan.

Simmer on low heat until the sugar dissolves, then remove from heat and stir in vanilla extract.

Extra Tips:
When preparing this sticky cake, confirm that all ingredients are at room temperature for better mixing.

Make sure to serve the cake flat-side up; this allows the toffee sauce to soak in, enhancing the flavor and moisture.

For added texture, consider including chopped walnuts either in the batter or as a garnish.

Finally, the cake is best when served warm, so enjoy it right out of the oven or reheat slightly before serving for the most delicious experience.

Final Thoughts

Final Thoughts

When you’ve finished baking and drizzling your sticky cake with toffee sauce, it’s time to reflect on how to improve both the flavor and presentation. To create a truly memorable sticky cake, consider these key elements:

  • Layer Construction: Use generous amounts of toffee sauce to maintain moisture. Guarantee your date-infused cake layers are well-trimmed and poked for even sauce distribution. A semi-naked cake style reveals beautiful layers, adding to its visual appeal.

  • Tips and Techniques: Incorporate baking soda to soften dates, making them easier to mash. Warm the toffee sauce before use, then cool it to prevent separation. Tools like parchment paper can simplify the cake release process. Additionally, remember that a (runny consistency) mixture is typical for this recipe, providing texture and moisture to the cake.

  • Ingredient Importance: Opt for Medjool dates for their soft texture and superior flavor. Experiment with black treacle or golden syrup for varied toffee tastes.

  • Baking and Assembly: Generously spread toffee sauce between layers for ideal moisture. Maintain a flat surface for seamless stacking, and allow cooling after applying frosting to guarantee a smooth finish.

FAQ

For those diving into the world of sticky cake baking, having your questions answered can make the process smoother and more enjoyable. Here are some common inquiries:

General Tips:

  • Preventative Measures: Line your baking pan with parchment paper to avoid stickiness.

  • Temperature Control: Lower the oven temperature and adjust baking time to prevent sticky tops.

  • Toothpick Test: Use a toothpick to check for doneness.

Common Causes of Stickiness:

  • Overbaking: This can lead to a sticky top due to caramelized sugars.

  • Overmixing: Mixing too much develops excess gluten, resulting in a dense texture.

  • Improper Cooling: Rushing the cooling can lead to stickiness.

Baking Techniques:

  • Even Spreading: Spread the batter evenly for consistent baking.

  • Proper Pan Preparation: Grease and flour the pan or use baking spray.

Handling and Storage:

  • Complete Cooling: Let the cake cool completely before handling. Kladdkaka is particularly sensitive to cooling, so ensure you follow this step for the best texture.

  • Proper Storage: Store in a cool, dry place to maintain texture.

Follow these tips, and you’ll achieve a delightful sticky cake every time!

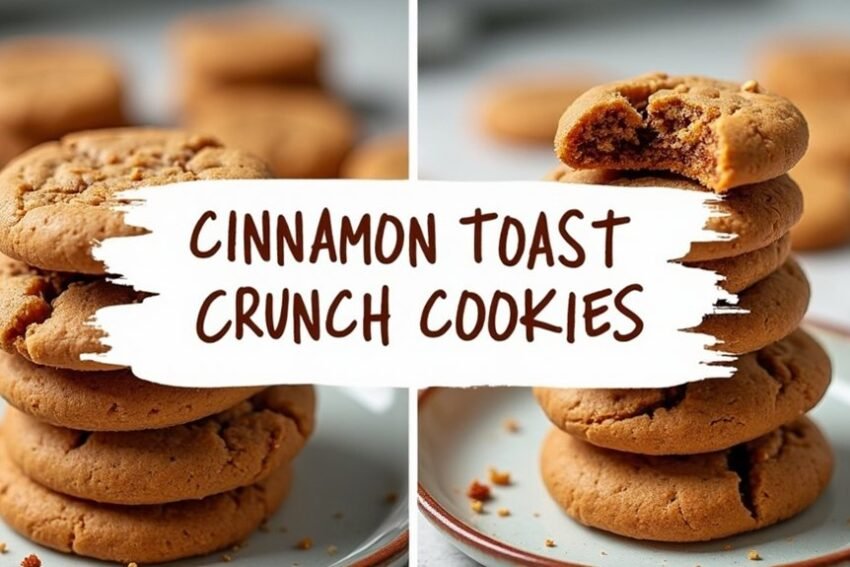
Cinnamon Toast Crunch Cookies Recipe – Sweet & Crunchy

Cinnamon Toast Crunch Cookies Recipe – Sweet & Crunchy

If you think cookies can’t be both sweet and crunchy, you might want to reconsider with the Cinnamon Toast Crunch Cookies recipe. Combining the nostalgic flavor of your favorite cereal with rich butter and white chocolate chips creates a unique treat that challenges traditional cookie expectations. You won’t just satisfy your sweet tooth; you’ll find yourself relishing each unique texture. And while you might think you know what to expect, there are some clever twists that enhance these cookies further. Curious about the steps to create this delightful concoction?

Key Takeaways

  • The recipe features butter, sugars, cinnamon, and crushed Cinnamon Toast Crunch for a sweet and crunchy flavor profile.
  • Mix wet and dry ingredients separately before forming the dough into balls and rolling in crushed cereal.
  • Bake cookies at 350°F for 8-13 minutes until golden, then cool briefly before transferring to a rack.
  • A glaze made from powdered sugar, milk, vanilla, and cinnamon adds extra sweetness to the cookies.
  • Store leftovers in an airtight container in the fridge to maintain freshness and crunch.

History

Cinnamon Toast Crunch has a rich history that dates back to 1984 when General Mills first introduced this iconic cereal. It began as plain squares but soon evolved to feature cinnamon-colored swirls on each piece, creating its now-signature look. Scientists John Mendesh and Elisabeth Trach invented this cereal, drawing inspiration from a fanciful idea submitted by a child during a General Mills radio contest.

Originally marketed outside Europe, the cereal featured a jolly baker mascot named Wendell, along with two other bakers, Bob and Quello, introduced in 1985. By 1991, Wendell became the sole mascot, though he was phased out in 2013 as marketing strategies shifted. The cereal’s distinct cinnamon-sugar flavor quickly captivated audiences, leading to its lasting popularity.

Targeted primarily at children in the U.S., Cinnamon Toast Crunch has experienced numerous product variations and special editions over the years. Its popularity led to the cereal’s introduction in international markets, such as the UK and Latin America, where it was marketed under different names.

From its delicious flavor to its evolving marketing approaches, Cinnamon Toast Crunch has solidified its place as a beloved cereal worldwide, inspiring numerous culinary adaptations and products.

Recipe

Cinnamon Toast Crunch Cookies Recipe

If you’re looking for a delightful twist on a classic treat, these Cinnamon Toast Crunch cookies are sure to hit the spot. Combining the rich flavors of butter, sugars, and spices with the irresistible crunch of everyone’s favorite cinnamon cereal, these cookies deliver a nostalgic taste that’s both crunchy and soft. Notably, the cookies are rolled in blended Cinnamon Toast Crunch cereal for an extra layer of flavor and crunch.

Perfect for sharing with friends and family, these cookies are also easy to make and incredibly addictive. With a glaze drizzled on top and a crunchy exterior, these cookies offer a great texture balance. Follow this easy recipe to create your batch of delicious Cinnamon Toast Crunch cookies, and enjoy the comforting flavors they bring to your kitchen.

Ingredients:

  • 1 cup softened butter
  • 1/2 cup granulated sugar
  • 3/4 cup brown sugar
  • 1 egg
  • 1 tsp vanilla extract
  • 2 cups all-purpose flour
  • 1 tsp baking soda
  • 1 tsp cornstarch
  • 1 tsp cinnamon
  • 1 cup Cinnamon Toast Crunch cereal for the batter
  • 1 cup crushed Cinnamon Toast Crunch cereal
  • 1 cup Cinnamon Toast Crunch crumbs for rolling
  • 1 cup white chocolate chips
  • 1/4 cup softened butter (for streusel)
  • 1/4 cup brown sugar (for streusel)
  • 1/2 cup flour (for streusel)
  • 1/2 tsp cinnamon (for streusel)
  • 1 1/2 cups powdered sugar (for glaze)
  • 2 tbsp milk (for glaze)
  • 1/2 tsp vanilla extract (for glaze)
  • 1/4 tsp cinnamon (for glaze)

Cooking Instructions:

Preheat your oven to 350°F and line baking sheets with parchment paper. In a blender, crush the Cinnamon Toast Crunch cereal into fine crumbs.

In a stand mixer, beat together the softened butter, granulated sugar, and brown sugar until creamy. Add in the egg and vanilla extract, mixing until well combined. Gradually add the dry ingredients (flour, baking soda, cornstarch, and cinnamon) and mix until just combined.

Fold in the crushed cereal and white chocolate chips. Use a large cookie scoop to form dough balls, rolling them in the crushed Cinnamon Toast Crunch cereal to coat. Place the cookies on the baking sheet and bake for 8-13 minutes, allowing them to cool on the sheet for 5-10 minutes before transferring to a cooling rack.

For the glaze, mix the powdered sugar, milk, vanilla extract, and cinnamon until smooth, then drizzle it over the cooled cookies.

Extra Tips:

To improve your baking experience, consider using a stand mixer for efficient mixing and avoid overworking the dough to maintain the perfect texture.

For easier handling, you can chill the dough before rolling it. Make sure to crush the Cinnamon Toast Crunch into fine crumbs for better coating consistency.

To add a creative flair, experiment with variations by incorporating different cereals, adding a marshmallow filling, or sprinkling some flaky sea salt on top for a delightful contrast to the sweetness. Enjoy your baking!

Final Thoughts

In the domain of baking nostalgia and flavor, Cinnamon Toast Crunch cookies deliver a delightful experience that’s hard to beat.

These cookies not only bring back memories but also showcase a variety in preparation methods and ingredients.

Here are some key takeaways:

  • Variety in Recipes: You can find multiple recipes ranging from homemade versions to ready-to-bake options like Pillsbury and Betty Crocker mixes.

  • Ingredient Focus: Using Cinnamon Toast Crunch cereal is essential for achieving that authentic, strong cinnamon flavor. Additionally, the Pillsbury Soft Baked Cinnamon Toast Crunch Cookies are ready to eat right out of the package, offering convenience for snacking.

  • Texture and Taste: Expect a delightful combination of soft, chewy, and crunchy textures in every bite.

Nutritionally, awareness is important:

  • Calories: Serving sizes typically range from 80 to 150 calories.

  • Allergens: Be cautious, as these cookies may contain common allergens like egg, soy, wheat, and milk.

Regardless of the approach you choose, these cookies make for a satisfying treat that’s perfect for any occasion.

Whether you opt for a homemade recipe or a store-bought option, the Cinnamon Toast Crunch experience promises to be both comforting and delicious.

Enjoy your baking adventures!

FAQ

If you’ve got questions about Cinnamon Toast Crunch cookies, you’re not alone! Here are some frequently asked questions to help guide you through the process.

What makes these cookies special?
They’re unique due to the crushed Cinnamon Toast Crunch cereal and the delightful cinnamon sugar flavor.

Key Ingredients:
– Unsalted butter
– Granulated sugar
– Brown sugar
– Eggs
– Vanilla extract
– All-purpose flour
– Cornstarch
– Baking soda
– Cinnamon
– Cinnamon Toast Crunch cereal

Baking Tips:
– Preheat your oven to 350°F.
– Bake for 11-13 minutes.
– Let the cookies cool for 2-5 minutes on the pan before transferring them to a cooling rack. They feature a blend of traditional snickerdoodle flavors and nostalgia.

Ingredient Substitutions:
– You can add white chocolate chips for extra flavor.
– Use 1 teaspoon of ground cinnamon for seasoning.
– Sugar levels can be adjusted to taste.

Storage:
You can make the cookies in advance. Store leftovers in an airtight container in the fridge.

Typically, a recipe yields about 15 large or 30 small cookies. Enjoy your baking!

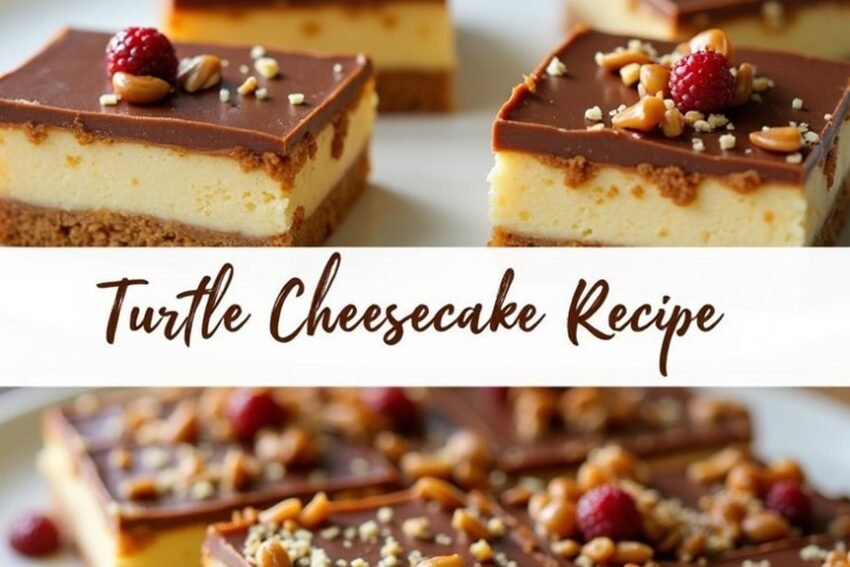
Turtle Cheesecake Bars Recipe – Decadent Dessert

Turtle Cheesecake Bars Recipe – Decadent Dessert

Imagine impressing your friends or family with a dessert that not only looks stunning but also delivers a rich fusion of chocolate, caramel, and pecans. Turtle Cheesecake Bars are just that—a perfect blend of creamy cheesecake filling on a crunchy crust that makes every bite an indulgence. You might be wondering how to achieve that ideal balance of flavors and textures in your kitchen. Let’s break down the recipe and investigate what makes these bars a must-try for your next gathering.

Key Takeaways

  • Combine crushed Oreo cookies with melted butter for a crunchy crust base before adding the creamy filling.
  • Use cream cheese, sugar, eggs, sour cream, and vanilla for a rich cheesecake filling.
  • Layer chocolate chips, caramel sauce, and pecans on top for a decadent finish.
  • Chill the bars for at least two hours to enhance the flavors and texture.
  • Serve garnished with whipped cream or maraschino cherries for an attractive presentation.

History

Cheesecake has a rich and fascinating history that dates back to ancient Greece, where it was first crafted around 2,000 B.C. on the island of Samos. Early Greek versions of this dessert were made from simple ingredients like flour, wheat, honey, and cheese. They weren’t just delightful treats but were often served at weddings and considered a source of energy.

Key historical points about cheesecake include:

  • First recipe: Athenaeus recorded the earliest known cheesecake recipe in 230 A.D.

  • Olympic significance: The dessert was even enjoyed during the first Olympic games.

As the Roman Empire expanded, cheesecakes evolved. Romans baked their “libuma” under hot bricks, occasionally incorporating pastry.

Remarkably, Marcus Cato documented a Roman cheesecake recipe in the first century B.C.

This delightful dessert crossed borders into Europe, where local ingredients modified traditional recipes. The introduction of cream cheese in the 1870s significantly influenced the evolution of cheesecake recipes, paving the way for the creation of modern variations.

By the 1545 publication of the first cookbook, cheesecake was defined as a flour-based sweet food.

Through these transformations, cheesecake laid the foundation for many modern variations, including the turtle cheesecake, reflecting both ancient traditions and contemporary innovations.

Recipe

Turtle Cheesecake Bars Recipe

If you’re in the mood for a delectable dessert that combines the rich flavors of chocolate, caramel, and pecans, search no further than Turtle Cheesecake Bars. These bars are a delightful twist on classic cheesecake, featuring a creamy filling atop a crunchy cookie crust, all adorned with luscious toppings. Perfect for special occasions or simply when you want to treat yourself, these bars are sure to impress with their flavorful layers and beautiful presentation.

Creating the Turtle Cheesecake Bars involves a few steps, but the end result is well worth the effort. The decadent filling, paired with the caramel and chocolate toppings, creates a harmonious balance that’s indulgently satisfying. Make certain to allow enough time for the cheesecake to cool and set properly, as this will guarantee clean cuts and a prime texture that everyone will love. The bars are also designed to be stored conveniently in an airtight container for up to 5 days to enjoy later.

Ingredients
– 12 oz. Oreo cookies or graham crackers
– 5 tablespoons melted butter (unsalted recommended)
– 3-4 packages (8 oz each) full-fat cream cheese, softened and at room temperature
– 1 cup granulated sugar (superfine sugar recommended)
– Eggs (the amount depends on your desired richness, usually 2-3)
– Sour cream (about 1 cup)
– 1 teaspoon vanilla extract
– 1/2 cup caramel sauce
– 1/2 cup chopped pecans (candied or plain)
– 1/3 cup mini chocolate chips or homemade hot fudge
– Heavy cream for caramel sauce and chocolate ganache (optional)
– Whipped cream and maraschino cherries for garnishing (optional)

Instructions
Preheat the oven to 325°F (165°C) and line a 9×13-inch baking pan with parchment paper. Crush the Oreo cookies or graham crackers and combine them with melted butter to form the crust, which should be pressed evenly into the bottom of the prepared pan.

In a large mixing bowl, beat the softened cream cheese and granulated sugar until smooth. Add the eggs, sour cream, and vanilla, mixing just until combined. Pour the cheesecake filling over the crust and bake for 40-45 minutes, until the center is firm and slightly jiggly.

Once done, allow the cheesecake to cool at room temperature before moving on to the toppings.

Extra Tips
For a smoother texture and clean cuts, verify that your cream cheese is at room temperature before mixing. If you’re short on time, consider preparing the crust and toppings ahead of your cheesecake assembly.

Also, chilling the bars in the refrigerator for at least two hours is essential for maximum flavor and texture. Finally, when cutting the bars, use a large, sharp knife and wipe it with a paper towel between cuts to maintain clean edges.

Enjoy your Turtle Cheesecake Bars as a delightful dessert that’s sure to be a crowd-pleaser!

Final Thoughts

After enjoying your delicious Turtle Cheesecake Bars, it’s time to reflect on what makes this dessert truly special. The combination of chocolate, caramel, and pecans offers a unique flavor profile that pays homage to the classic turtle candy.

Here are a few key points to ponder:

  • Versatility: These bars can be made as a portable option, allowing for easy sharing and serving.

  • Preparation Methods: You have the flexibility to bake or prepare them without baking, catering to various dietary needs.

  • Customization: Personalize your creation with homemade candied pecans or your favorite caramel sauce for a special touch.

  • Assembly Flexibility: Assemble the components over several days, fitting into your schedule seamlessly. Remember that you can also use store-bought graham crackers for convenience in your recipe.

When it comes to presentation, the layering of the graham cracker crust, cheesecake filling, and toppings improves visual appeal.

Think about garnishing with whipped cream or maraschino cherries for added charm. Drizzling warm caramel and hot fudge right before serving boosts the experience.

Ultimately, Turtle Cheesecake Bars blend nostalgia with modern dessert trends. They’re not just a treat; they’re a delightful exploration of flavors that invites you to get creative in the kitchen.

Enjoy the satisfaction of crafting this decadent dessert for yourself and your loved ones.

FAQ

You might’ve a few questions regarding making Turtle Cheesecake Bars, and that’s completely normal!

Here are some common inquiries to help clarify your baking process.

What can I use for the crust?
You can choose either crushed Oreo cookies or graham cracker crumbs.

How do I prepare the crust?
Mix the crushed cookies or crumbs with melted butter, then press the mixture into a 9×13 inch or 9-inch square pan.

What ingredients do I need for the filling?
You’ll need full-fat cream cheese, sour cream, granulated sugar, eggs, and vanilla extract. It’s essential to have these ingredients at room temperature to avoid lumps. Additionally, you can enhance the flavor with chocolate for flavor enhancement.

How should I customize my bars?
Toppings can vary! Classic turtle toppings include caramel sauce, mini chocolate chips, and chopped pecans. Feel free to swap pecans for peanuts or cashews.

How can I store leftover bars?
Keep them in an airtight container in the fridge. You can also prepare the crust and filling ahead of time and refrigerate them for up to two days.

Following these guidelines will help guarantee your Turtle Cheesecake Bars are a success!